This thing is solid wood and it was heavy! I could tell my husband didn't see the potential in the desk, all he saw was the fact that it was put at the curb for trash pick up. I knew exactly what I was going to do to this desk. I started off by sanding it with my handy dandy electric sander. Then I painted it with three coats of a high hiding white paint. After the paint dried I distressed it with a sanding block.
Saturday, August 31, 2013
Garbage Find Re-Do
At this point you may be wondering if trash digging is a favorite pastime of mine, but I assure you I have never gone trash digging. What happens is I see furniture in people's trash while I'm jogging or driving. This desk for example was found while out for a jog in my neighborhood.
Anchor Stool
I literally found this stool in someone's trash. Of course it didnt look like this at the time. When I found the stool it was plain wood but it was dirty and had bits of mold on it. I sanded it clean, threw some paint on it and DONE! Unfortunately I do not have a place for it in my house 👎 so I sold it for $25 (girl's gotta put food on the table).
Paint Stick Coastal Flag
I got this creative idea from Crafts By Amanda blog. She has a wonderful step-by-step tutorial on how to make this. My advice to you is to use 5 gallon paint bucket stir sticks and not the regular paint sticks.
http://craftsbyamanda.com/2013/05/paint-stick-beach-flag.html
This was a fun and basically free craft! I live in Florida so the starfish are readily available. I used hot glue to secure the sticks together by gluing a shortened paint stick across the backs of the sticks. Used twine to make a hanging loop. Done!
Sunday, August 18, 2013
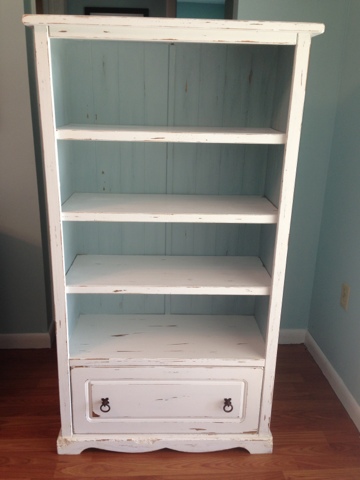
Bookcase re-do
I found this solid wood bookcase on Craigslist for only $25! It's so difficult to find solid wood furniture these days so when I find a piece for a good price I grab it!
I used a high hiding white paint:
Saturday, August 10, 2013
Pallet Wall Art
I love all the pallet transformations on Pinterest right now. I don't have room for a pallet table or anything big like that so j made some pallet wall art for my house. (I didn't hang all these in my house, I gave some to family and friends).
My wonderful and helpful hubby took a pallet apart and nailed them all together using a slab of wood. Here's what that looks like:
Teal seahorse I made for a friend:
Mermaid:
My tip is to screw in heavy duty picture wire into the back of the board:
You don't have to put a sealant or top coat on because the wood stain has it already built in. Plus it's a pallet, it's used to being in the rain and outside.
Then I stained the wood using a dark walnut stain:
After staining the wood: (staining is a very messy and sticky job, be sure to wear gloves)
Helpful hint: draw your design on a large piece of cardboard, cut it out and trace it on the pallet wood.
I drew the seahorse on using a chalk pen (if you mess up you can wipe off)
I used a high hiding white paint. It took two coats.
Here's a few others I've done:
Tarpon:
Crab:
Other seahorse:
Gecko:
Jellyfish:
Shark:
Headband Holder
I love my headbands but hated that they got smashed in my hair accessory drawer. I think I've seen this headband holder idea on Pinterest.
I found a piece of scrapbook paper in my stock of paper and went for it! I used glossy Mod Podge to glue and seal the paper on the oatmeal container.
I stuffed my elastic headbands inside the container and put my regular headbands on the outside. The only down fall is that this container takes up a lot of room but I think it's worth it because I spend a good amount of money on hair accessories and I'd like to keep them in good shape.
Thrift Store Find Makeover
The second I laid eyes on this seahorse figurine at Goodwill I knew I would use my handy dandy spray paint collection to make it fit my coastal house decor perfectly! Two coats of blue spray paint later and it's done! I love it!
Subscribe to:
Comments (Atom)


